improved
Design system
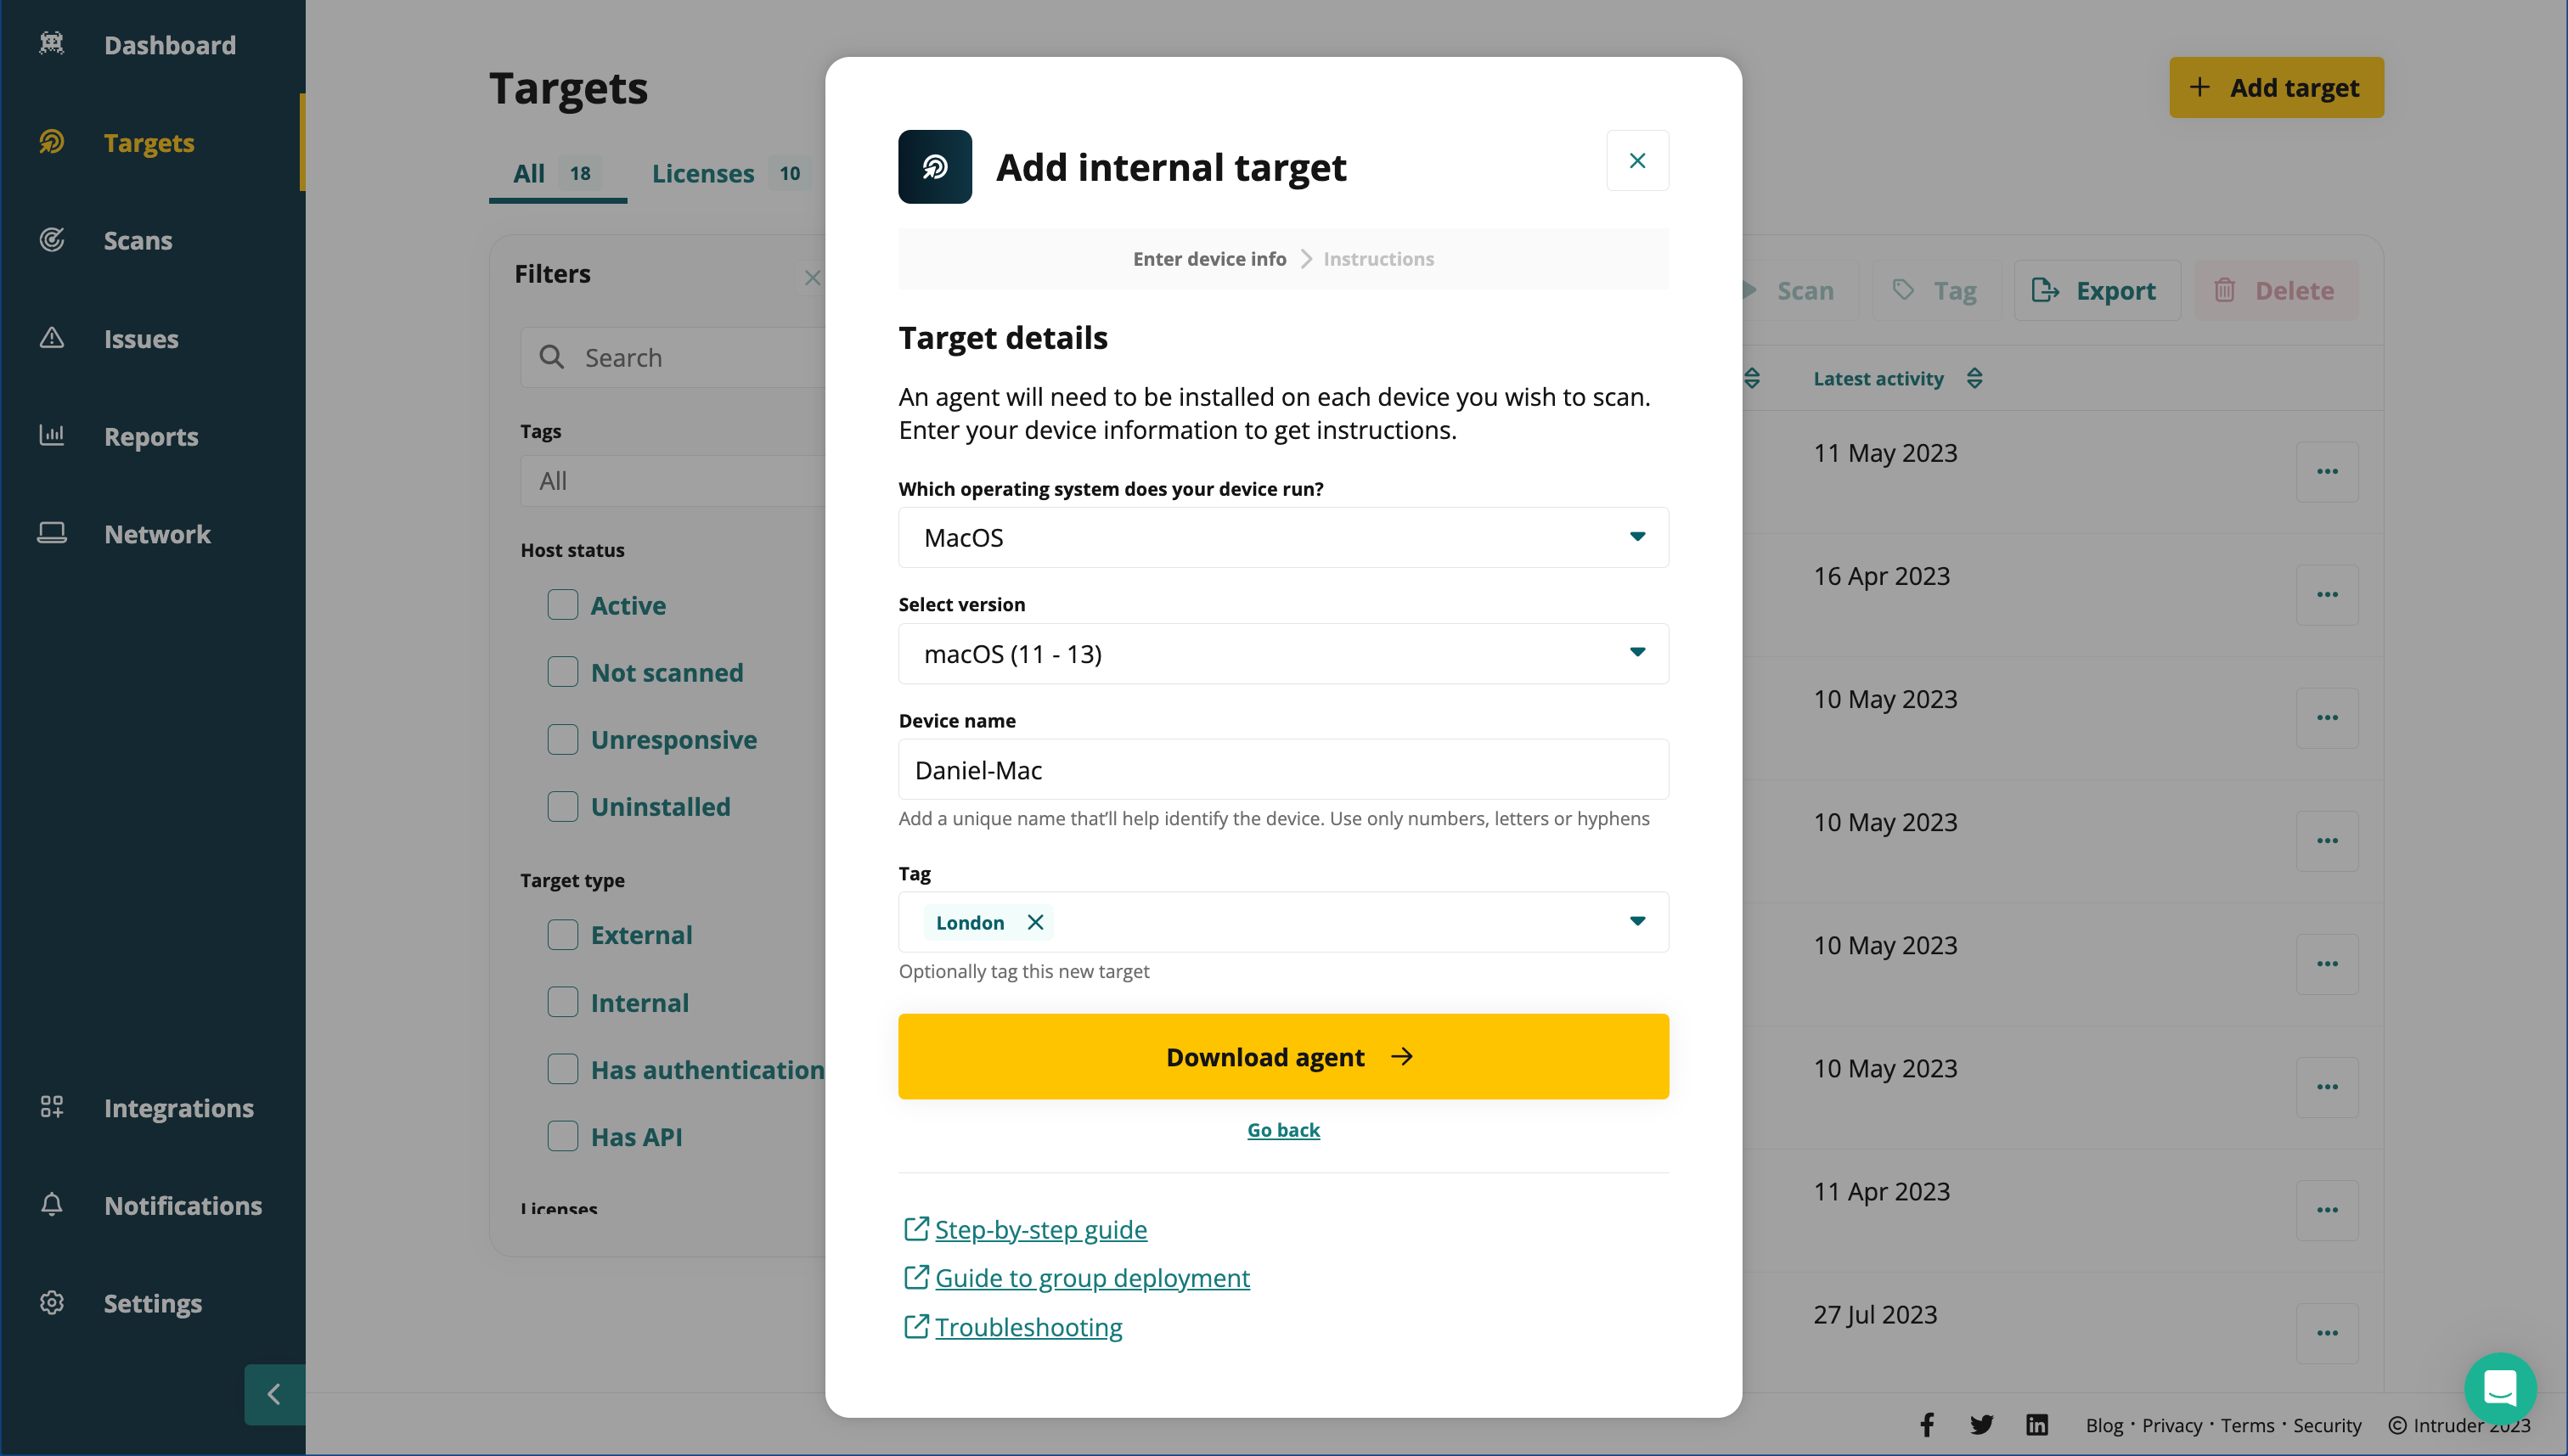
Improving on the internal target workflow
When adding a target to Intruder, we want to ensure you have full confidence that you are following the process correctly. Previously, the internal target install process could be confusing and left you waiting to hear from Tenable if the agent was installed correctly.
With our latest release, we've updated the install process to provide more feedback throughout. You'll be able to:
- Add a tag to an internal target during setup
- Download the correct agent for the OS and version that you've selected directly from Intruder, rather than being sent to the Tenable page
- See the target immediately on your targets list with a new status of 'Added. Awaiting agent'
- Once the agent has been installed and linked to Tenable, you'll be able to see a new status of 'Agent installed. Ready to scan'
- If an agent is unlinked or uninstalled from the target, you'll be able to see a new status of 'Agent uninstalled'
- Quickly search for all targets page which have the agent uninstalled with a new filter for the targets page
- A new column for all targets showing the latest activity, and the date of the latest activity
Additionally we've also visually updated the steps for adding a cloud target and an external target, bringing this entire workflow into our new design system.
If you would like to book some time to discuss this with a member of the Product team, you can do so here. We look forward to hearing your feedback!